Posts

Showing posts with the label Technology

Earthquake machine with Lego and Microbit

Image
The idea for today's project came from making a competition in my class to see who could design a building that can survive an earthquake. I saw this same idea in Lego Masters and it looked fun. Unfortunately, we didn't get to do it because we ran out of time before the school year finished, but I learnt a lot in the process. This project is about an earthquake machine that I built with Lego and Micro:bit. It features 4 different speeds to make increasingly harder to survive and also resembles a bit what would happen in a real earthquake as the P, S and surface waves arrive. Here is what the full thing looks like so let's delve into more detail. As you can see here, when you pay close attention we have reused the Minecraft salvation console because it also used a 9 volt pump so all I had to do was switch it out for my 9 volt Lego motor and it was good to go. In this image below you can see the motor shield that I used to drive the 9 volt motor for this project. It is the ...

Making a 3 axis seismometer with Microbit

Image
As I promised last blog post, I will be showing you how to make a 3 axis accelerometer. Three axis are better than one because it makes it easier to distinguish when the P and S waves arrive which helps measure the epicenter.   Here's what you will need: a Micro:bit, a USB cable, and a computer. The code in the image below is reading the acceleration for the x, y and z axis and redirecting the readings to the USB so that it can be graphed. You might have noticed  the "+1023" to the value of the 'z' axis. If we don't do this, it will always be reading "-1023" due to the force of gravity. In this video I will show you the seismometer in action. I decided to test it in school to see if, when all the kids in my class jumped at the same time we could cause an earthquake. Even though all twenty eight kids jumped at once, the earthquake was very minor and barely noticeable on the diagram. Due to the lack of seismic activity in Australia I have decided not t...

AI Recycling Robot

Image
Today I am sharing a video of a robot that uses AI to sort rubbish to improve recycling. This is a robot I have done as part of a bigger project for a coding competition in my country. The robot can only identify cans and plastic bottles. I found that training the model to detect other types of waste would be easy. The hard part is the mechanical components. I can rotate a servo both ways but manipulating more than two types of waste would require a conveyor belt and more complex mechanisms. The project was about recycling. The rest of the project included a website with HTML and CSS, a Scracth application and an app for Android mobile phones. I hope you enjoy the video!

DIY Infinity Mirror

Image
Today I am going to show you how I made an infinity mirror. You might be wondering, what is an infinity mirror? It is a device that tricks your eyes into believing you are looking at something very deep when in reality it isn't. The key is to have a narrow frame with a mirror at the back, a one way mirror at the front and some lights inside. What happens is that some of the light comes out through the partial mirror in every rebound, so you end up the same lights multiple times. As I write this, I am realizing that it is much easier to show it than to explain it. So, this is the end result. Materials and tools You are going to need the following: a frame with tall straight walls on the inside. Many frames are not like this, but this is necessary if you want to use an LED strip like me for cool effects LED strip cut-to-size mirror for the back cut-to-size glass or acrylic for the front one way mirror film. These are very cheap in Aliexpress Jumper (Dupont) cables like the ones you u...

Making a Vacuum chamber at home

Image
Today I am telling you about a vacuum chamber I have built at home. This is going to help me perform many experiments. You will see more posts coming soon about this topic. I built it with a simple jar, a big syringe and aquarium equipment link tubing and valves. You can find more find details in the video below. I had to drill two holes in the lid one for the pipe and another for a sensor. I used the BME280 sensor to measure the pressure inside with the help of a Microbit. This is what the sensor looks like. To read the values I installed the Enviro:Bit extension in the Microbit. This is the code I used. As you can see, with the BME280 you can also measure temperature and humidity. In this project we also learnt the importance of sealing the jar well as the air molecules are incredibly small and they will try to get get in and ruin your vacuum. I used a hot glue gun to seal the gap in between and around the cables. This is what the finished setup looks like. In this video you will see...

My first Lego Spike project

Image
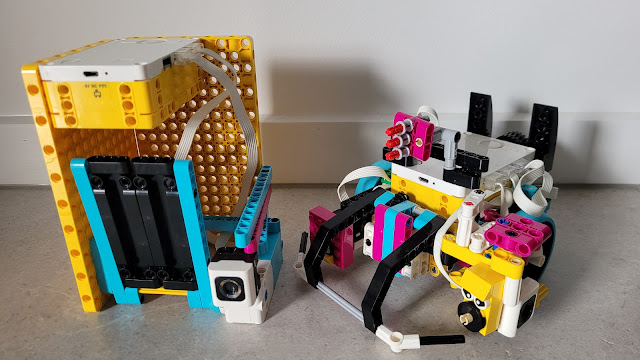
What inspired me to make this project was my teacher's farm. She has 75 chickens and she complains that snakes are a problem and also getting up early in the morning to open the chicken coop. So I decided to make two robots to solve her problem. The first robot opens the chicken coop automatically at day time and closes at night time. The second robot goes around the farm and captures any snakes so that they can't have chicken for breakfast. Then it carries the snake out of the farm making sure it doesn't damage any of my teacher's precious eggs and chickens in the process. To solve it I had to learn new skills such as my blocks, basic line following algorithms and sensors I had never worked with before.   This is a video demonstrating the solution I made.

Arcade Game - Minecraft Salvation

Image
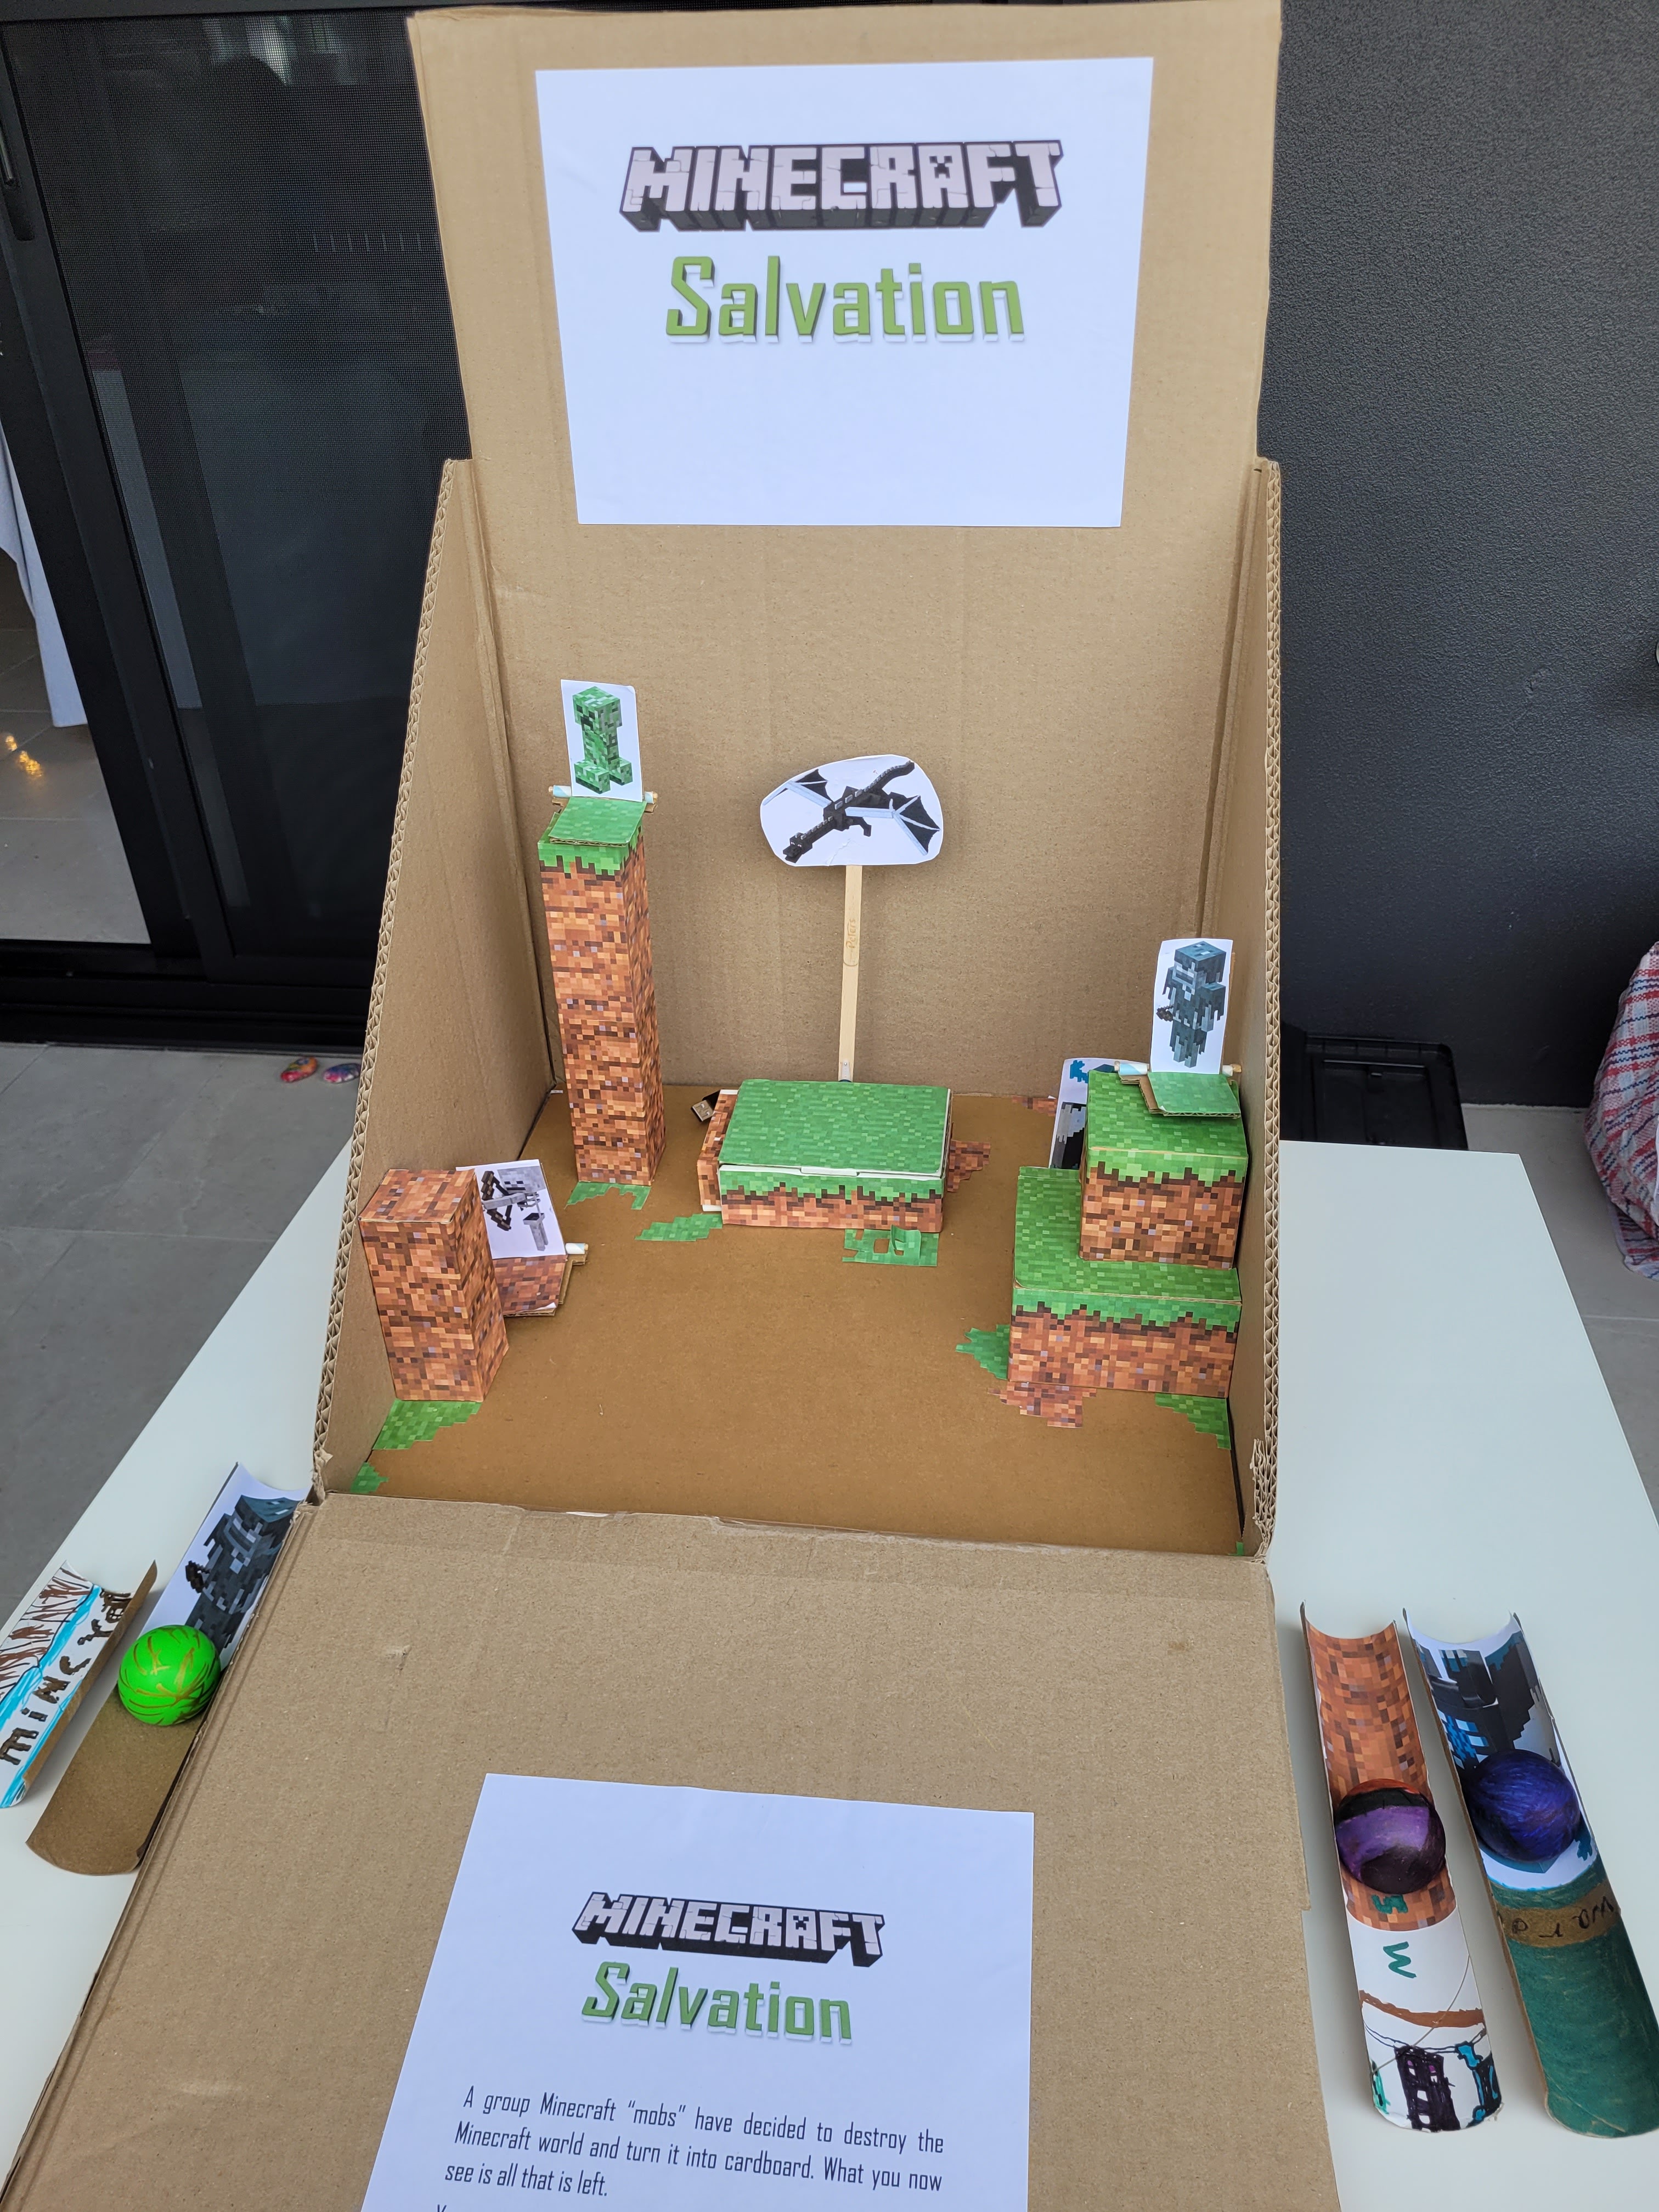
Originally, the main reason why I made Minecraft salvation was; unlike the other projects, due to a school exam. And in case you thought I was a PhD, I'm not, and yes, I go to school, hence, some of my projects originate with an exam or a test. The game story line is about a group of Minecraft mobs (living things that are not humans in Minecraft) which decided to destroy the Minecraft world and turn it into cardboard. The goal of the game is to kill the five mobs: Creeper, Stray, Skeleton, Warden and Ender dragon. Only then, will Minecraft world survive so that all the kids and adults in the world can play Minecraft again; actually, realistically not the adults.  At the beginning of the game you can choose your favourite launcher and ball. You are then given ten shots to shoot all the non moving targets:  Creeper, Stray, Skeleton and Warden and the moving target, the Ender dragon. If you don't manage to defeat them in ten shots or less you loose and Minecraft will be destroyed...

Security system with Microbit

Image
In this blog post I am going to show you a prototype of a security system I created some time ago. It involves 2 LEDs with resistors, a microservo and a Microbit V2 if you want to hear sounds. This is the code. As you can see the A and B buttons add A's and B's to a string variable called "keystroke". Then when you press A+B it compares "keystroke" with "password". As you can see the password is "ABA" but you can set it to whatever you want. I have recorded a video with the demo. Enjoy!

Europa Clipper

Image
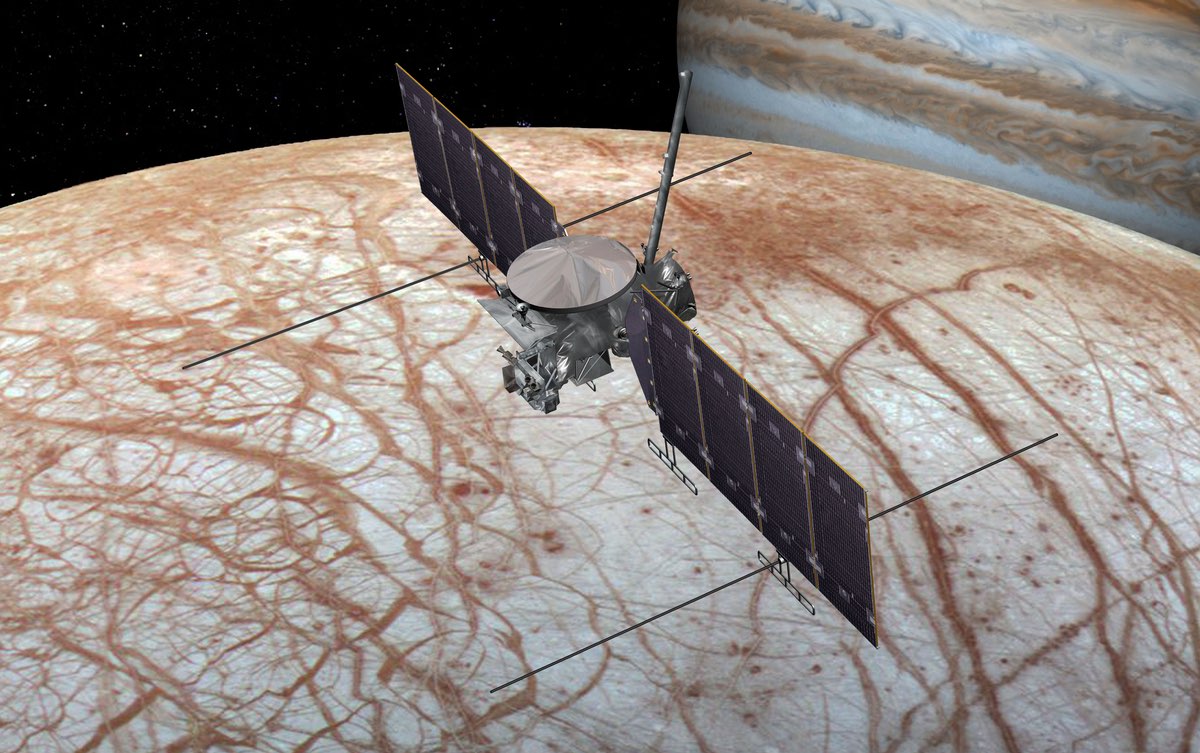
  Today I will be telling you about a mission called Europa a Clipper. Mission The main goal of the mission is to find whether there could be life under the surface of Europa. Mission will launch on October 2024 and arrive to Jupiter on 2030. The mission will end on 2034 after completing 20 flybys as close as 25 kilometres (2.5 times higher than a plane) to scan the entire moon. Spacecraft Europa Clipper is the largest spacecraft ever developed by NASA. Since it has to travel so far, it has an array of solar panels which is 27 metres wide when deployed. All electronics are shielded in a titanium and aluminium vault to protect them from Jupiter's radiation. Destination Europa is one of the four moons discovered by Galileo. Europa is the second closest moon to Jupiter in between Io and Ganymede. Io is the most volcanic body in our solar system. Europa has the biggest ocean in the solar system and Ganymede is the biggest moon in the solar system. Joining the mission Yo...

Microbit sun exposure timer

Image
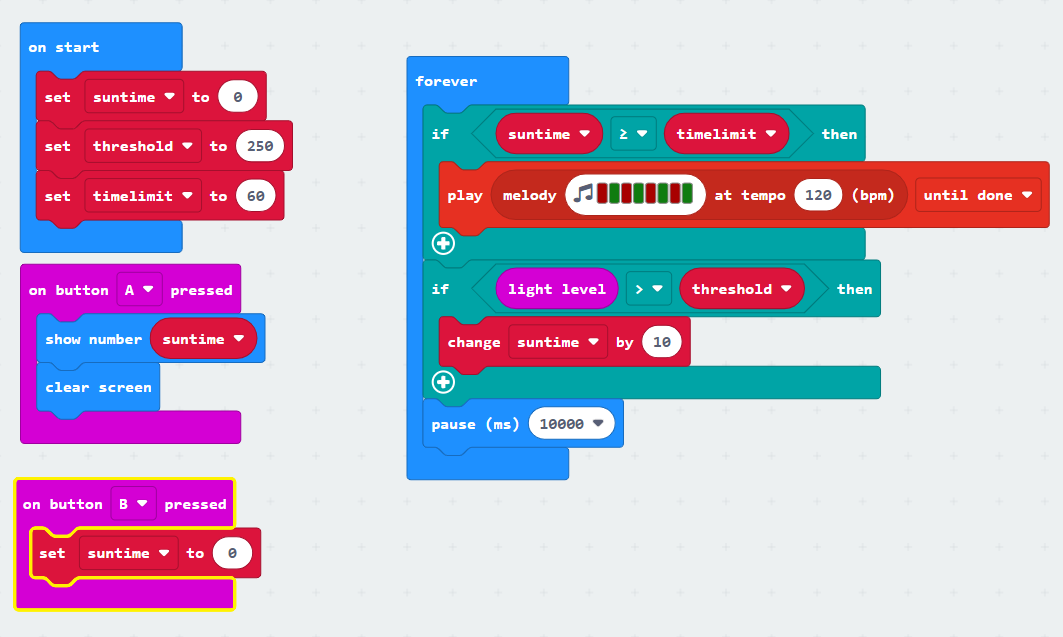
This project is about building a device that measures how long you have been in the sun. This is very important in Australia because of the ozone layer. They always tell us in school to reapply sunscreen every 2 hours but I am using this project for a coding challenge. This project uses the onboard LEDs as a brightness sensor. The detects all kind of light, not only ultra-violet which is the real danger, but it still helps me prove the idea. A real product should use an UV sensor and be more compact. This is the code. It uses a variable to count how many seconds you have been under the sun. The Micro:bit warns you with a sound if it has gone over the time limit, so to run this code you will need a Micro:bit version 2. After testing the code in the sun and indoors I set the brightness limit to 250. When the reading is below 250 it will not count. Pressing button A shows you how long you have been in the sun. Once you reapply sunscreen you need to press button B to restart. The time limi...

Microbit step counter

Image
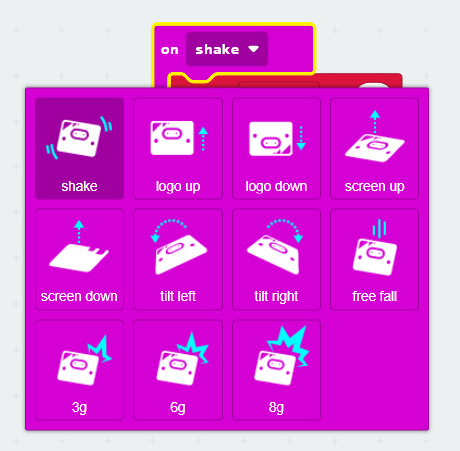
In this blog post I made a step counter. I am planning to use this for a coding challenge in the place where I live. The purpose is to help people track how much moderate activity they do The solution uses a Micro:bit which is the same microcontroller for kids that I have used in other projects. This project uses the accelerometer to count your foot steps. The accelerometer is a type of sensor that detects movement. These are the movements you can detect with the accelerometer. My project uses "on shake" This is the code. I made a variable called "steps" that keeps track of how many steps have been detected. It gets increased by 2 every time it gets shaken because we have two legs. If button A is pressed it will set the "steps" to 0 and if you press button B it will show how many steps you have walked so far. In the following video you can how it works

Practicing times tables

Image
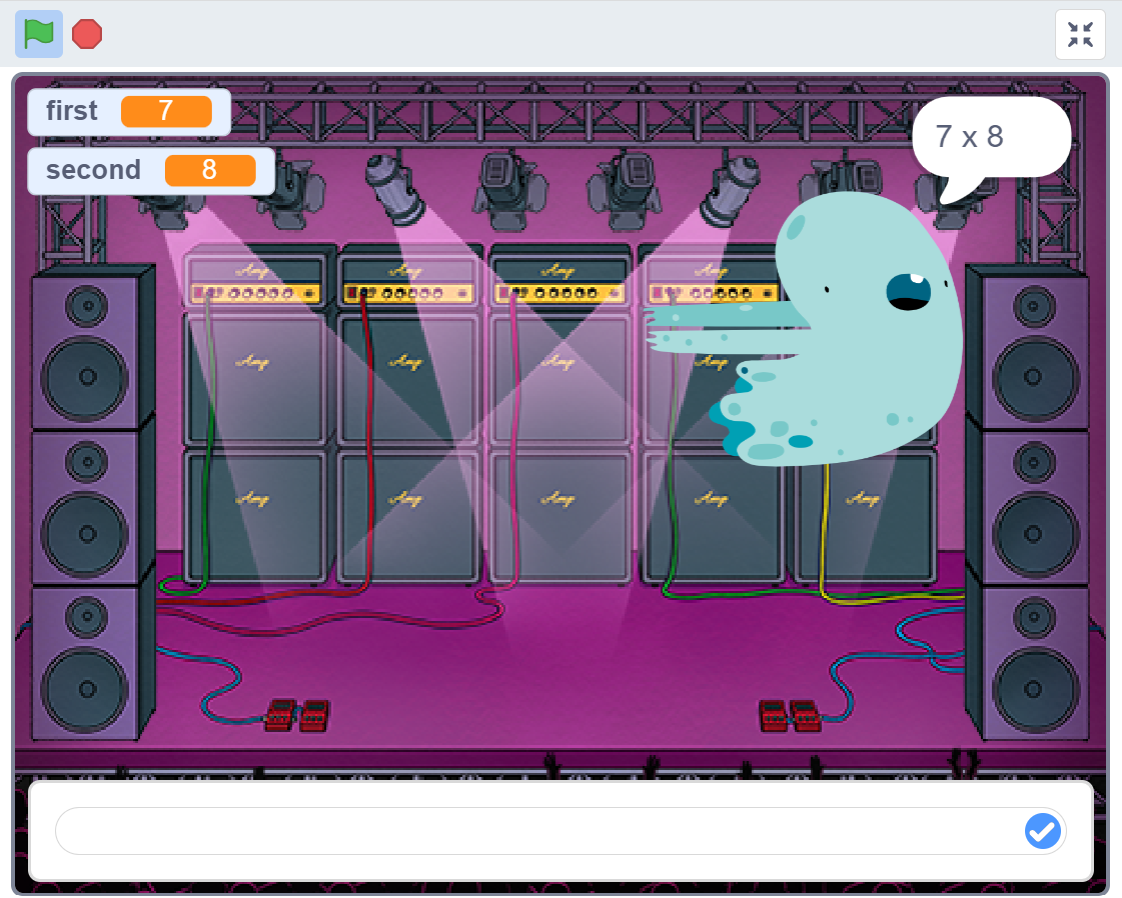
In this blogpost I will tell you about a program I made so that anyone can practice times tables for free. In order to learn the times tables you need someone to ask you random questions but if your parents/carers are busy, this program will never say "I am busy". When you click the green flag the ghost glides on to stage and will ask you 20 random questions. It will tell you if your answer is correct. If you get it wrong it tells you the right answer. However, it doesn't keep track of how many questions you get right or wrong so that you don't get upset. The important thing is to practice often and not to let your mistakes make you sad. By default it will ask you 20 questions from all times tables between 2 and 9. If you have an account in Scratch you can modify it to suit your needs. The important code is in these 3 lines For example, what if want to get 30 questions and only practice the 7 times tables? You can change the code like this. You can access the program ...

Tombstone - Micro:bit robot

Image
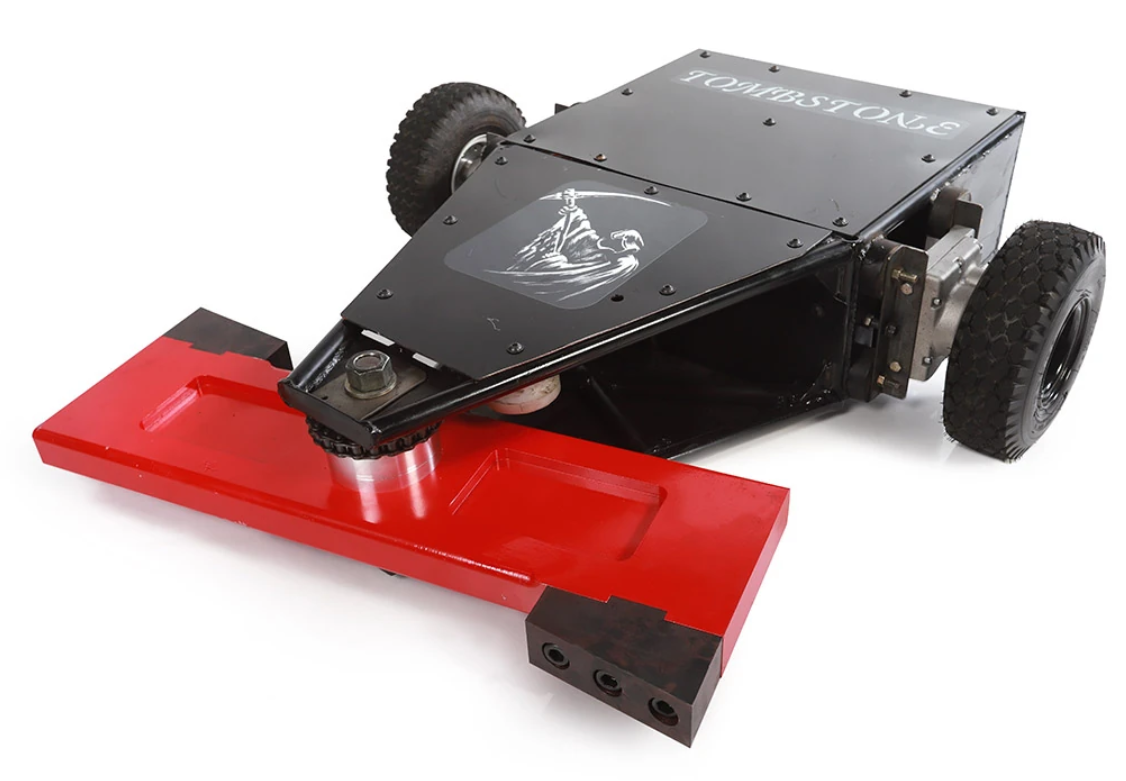
The inspiration for this project was a TV series called Battlebots. We saw 2 seasons on Netflix. It was about robots battling each other in an arena. My favorite robot was called Tombstone. This is the robot we built. It uses some Micro:bit components, some motors and Lego Technic pieces.  It is powered with a USB power bank. The chassis is made out of cardboard and the components are attached with zip ties and blue tag This project requires motors to move the robot and to move the blade at the front. As you can see in the photo we are using 1 Lego motor to move the Lego Technic that controls the blade and 2 non-Lego motors that move the robot. We also added a swivel castor wheel for support Making the robot we discovered that can't connect the motors directly to the pins on the Micro:bit because you can fry the Micro:bit. So you need to use a motor shield. There are many available but we are using this one from Dfrobot. It is called the Dfrobot Micro:bit expansion board. This one ...

Micro:bit watering system

Image
My class has been doing an experiment on plants where we had to water them at different times.  We have been watering our plants manually which means it is not very accurate. So I thought maybe we could make a machine to water them perfectly. Our solution is based on a microcontroller called the Micro:bit. We have a moisture sensor reading the amount of moisture in the plant and sending it to the Micro:bit through a cable. If the moisture is less than a certain level, which depends on the plant, it will send a message to switch on the pump. You may be wondering, what is the thing connected to the hose of the pump? Well, that is a shower cap that we designed and 3D printed to spread the water better. If you are interested on printing the shower cap (water spreader) you can download the files from Thingiverse here:  https://www.thingiverse.com/thing:6204986 This is the code for the Micro:bit The following video shows how the whole thing works