Posts

Showing posts with the label Art-design

DIY Infinity Mirror

Image
Today I am going to show you how I made an infinity mirror. You might be wondering, what is an infinity mirror? It is a device that tricks your eyes into believing you are looking at something very deep when in reality it isn't. The key is to have a narrow frame with a mirror at the back, a one way mirror at the front and some lights inside. What happens is that some of the light comes out through the partial mirror in every rebound, so you end up the same lights multiple times. As I write this, I am realizing that it is much easier to show it than to explain it. So, this is the end result. Materials and tools You are going to need the following: a frame with tall straight walls on the inside. Many frames are not like this, but this is necessary if you want to use an LED strip like me for cool effects LED strip cut-to-size mirror for the back cut-to-size glass or acrylic for the front one way mirror film. These are very cheap in Aliexpress Jumper (Dupont) cables like the ones you u...

How to build your own telescope

Image
Learning about lenses , refraction and optics in general has now enabled me to make my own telescope. I wanted to build one because I have always loved space and astronomy. Another day I must tell you about a hobby of mine, launching water rockets.  There are two main types of telescopes: refractors (made out of lenses) and reflectors (use mirrors too). Galileo Galilei made one of the first refractor telescopes and Isaac Newton made the first reflector. The one I built is a refractor, which is a bit cheaper to build.  How it works In this diagram you can see that the telescope has two lenses: The first is called the "objective". The function of the objective is to create an image with the light comes from the celestial body. The light rays come in parallel because the object is very far away. This means the image forms in the focal point. The image is inverted though. The second lens is called the "eyepiece" and it typically has a much smaller focal length. The eye...

Arcade Game - Minecraft Salvation

Image
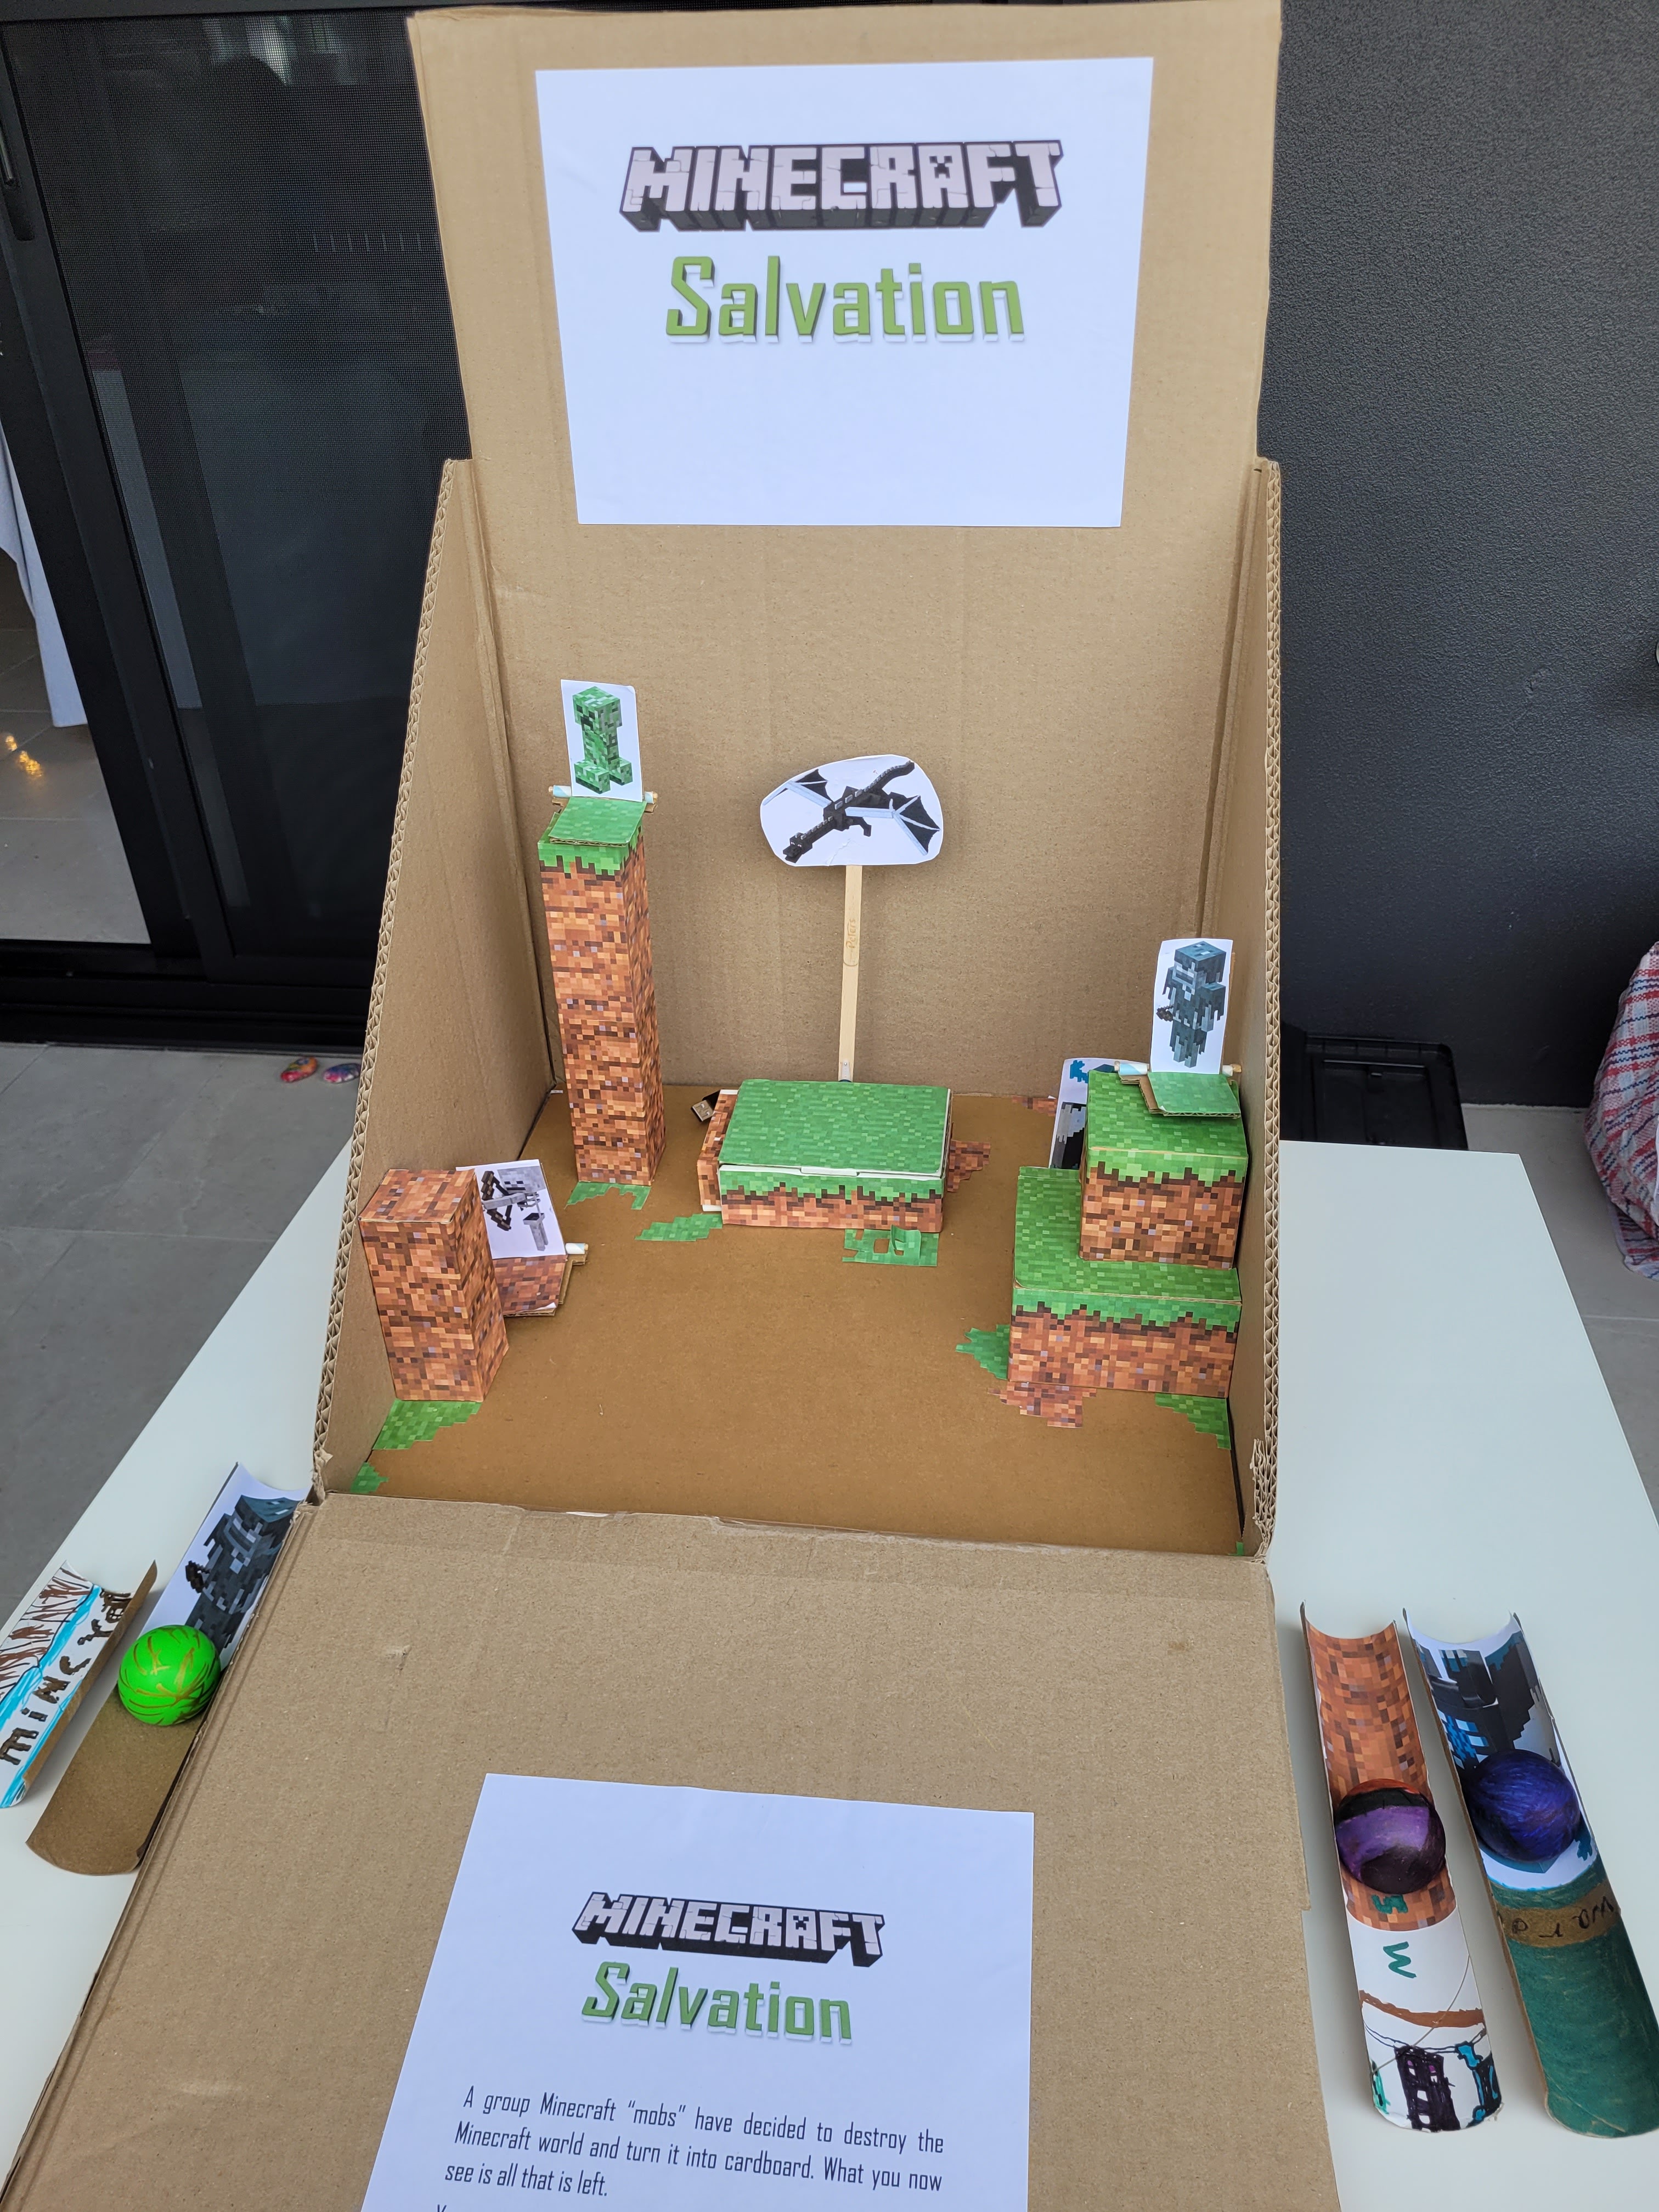
Originally, the main reason why I made Minecraft salvation was; unlike the other projects, due to a school exam. And in case you thought I was a PhD, I'm not, and yes, I go to school, hence, some of my projects originate with an exam or a test. The game story line is about a group of Minecraft mobs (living things that are not humans in Minecraft) which decided to destroy the Minecraft world and turn it into cardboard. The goal of the game is to kill the five mobs: Creeper, Stray, Skeleton, Warden and Ender dragon. Only then, will Minecraft world survive so that all the kids and adults in the world can play Minecraft again; actually, realistically not the adults.  At the beginning of the game you can choose your favourite launcher and ball. You are then given ten shots to shoot all the non moving targets:  Creeper, Stray, Skeleton and Warden and the moving target, the Ender dragon. If you don't manage to defeat them in ten shots or less you loose and Minecraft will be destroyed...

Microbit sun exposure timer

Image
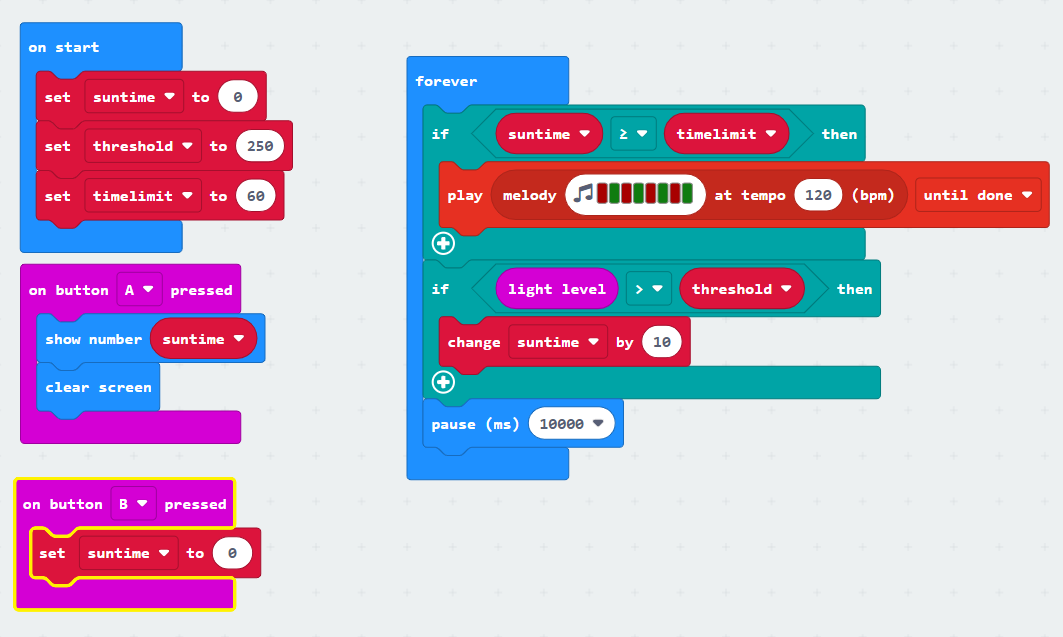
This project is about building a device that measures how long you have been in the sun. This is very important in Australia because of the ozone layer. They always tell us in school to reapply sunscreen every 2 hours but I am using this project for a coding challenge. This project uses the onboard LEDs as a brightness sensor. The detects all kind of light, not only ultra-violet which is the real danger, but it still helps me prove the idea. A real product should use an UV sensor and be more compact. This is the code. It uses a variable to count how many seconds you have been under the sun. The Micro:bit warns you with a sound if it has gone over the time limit, so to run this code you will need a Micro:bit version 2. After testing the code in the sun and indoors I set the brightness limit to 250. When the reading is below 250 it will not count. Pressing button A shows you how long you have been in the sun. Once you reapply sunscreen you need to press button B to restart. The time limi...

Designing a test tube stand

Image
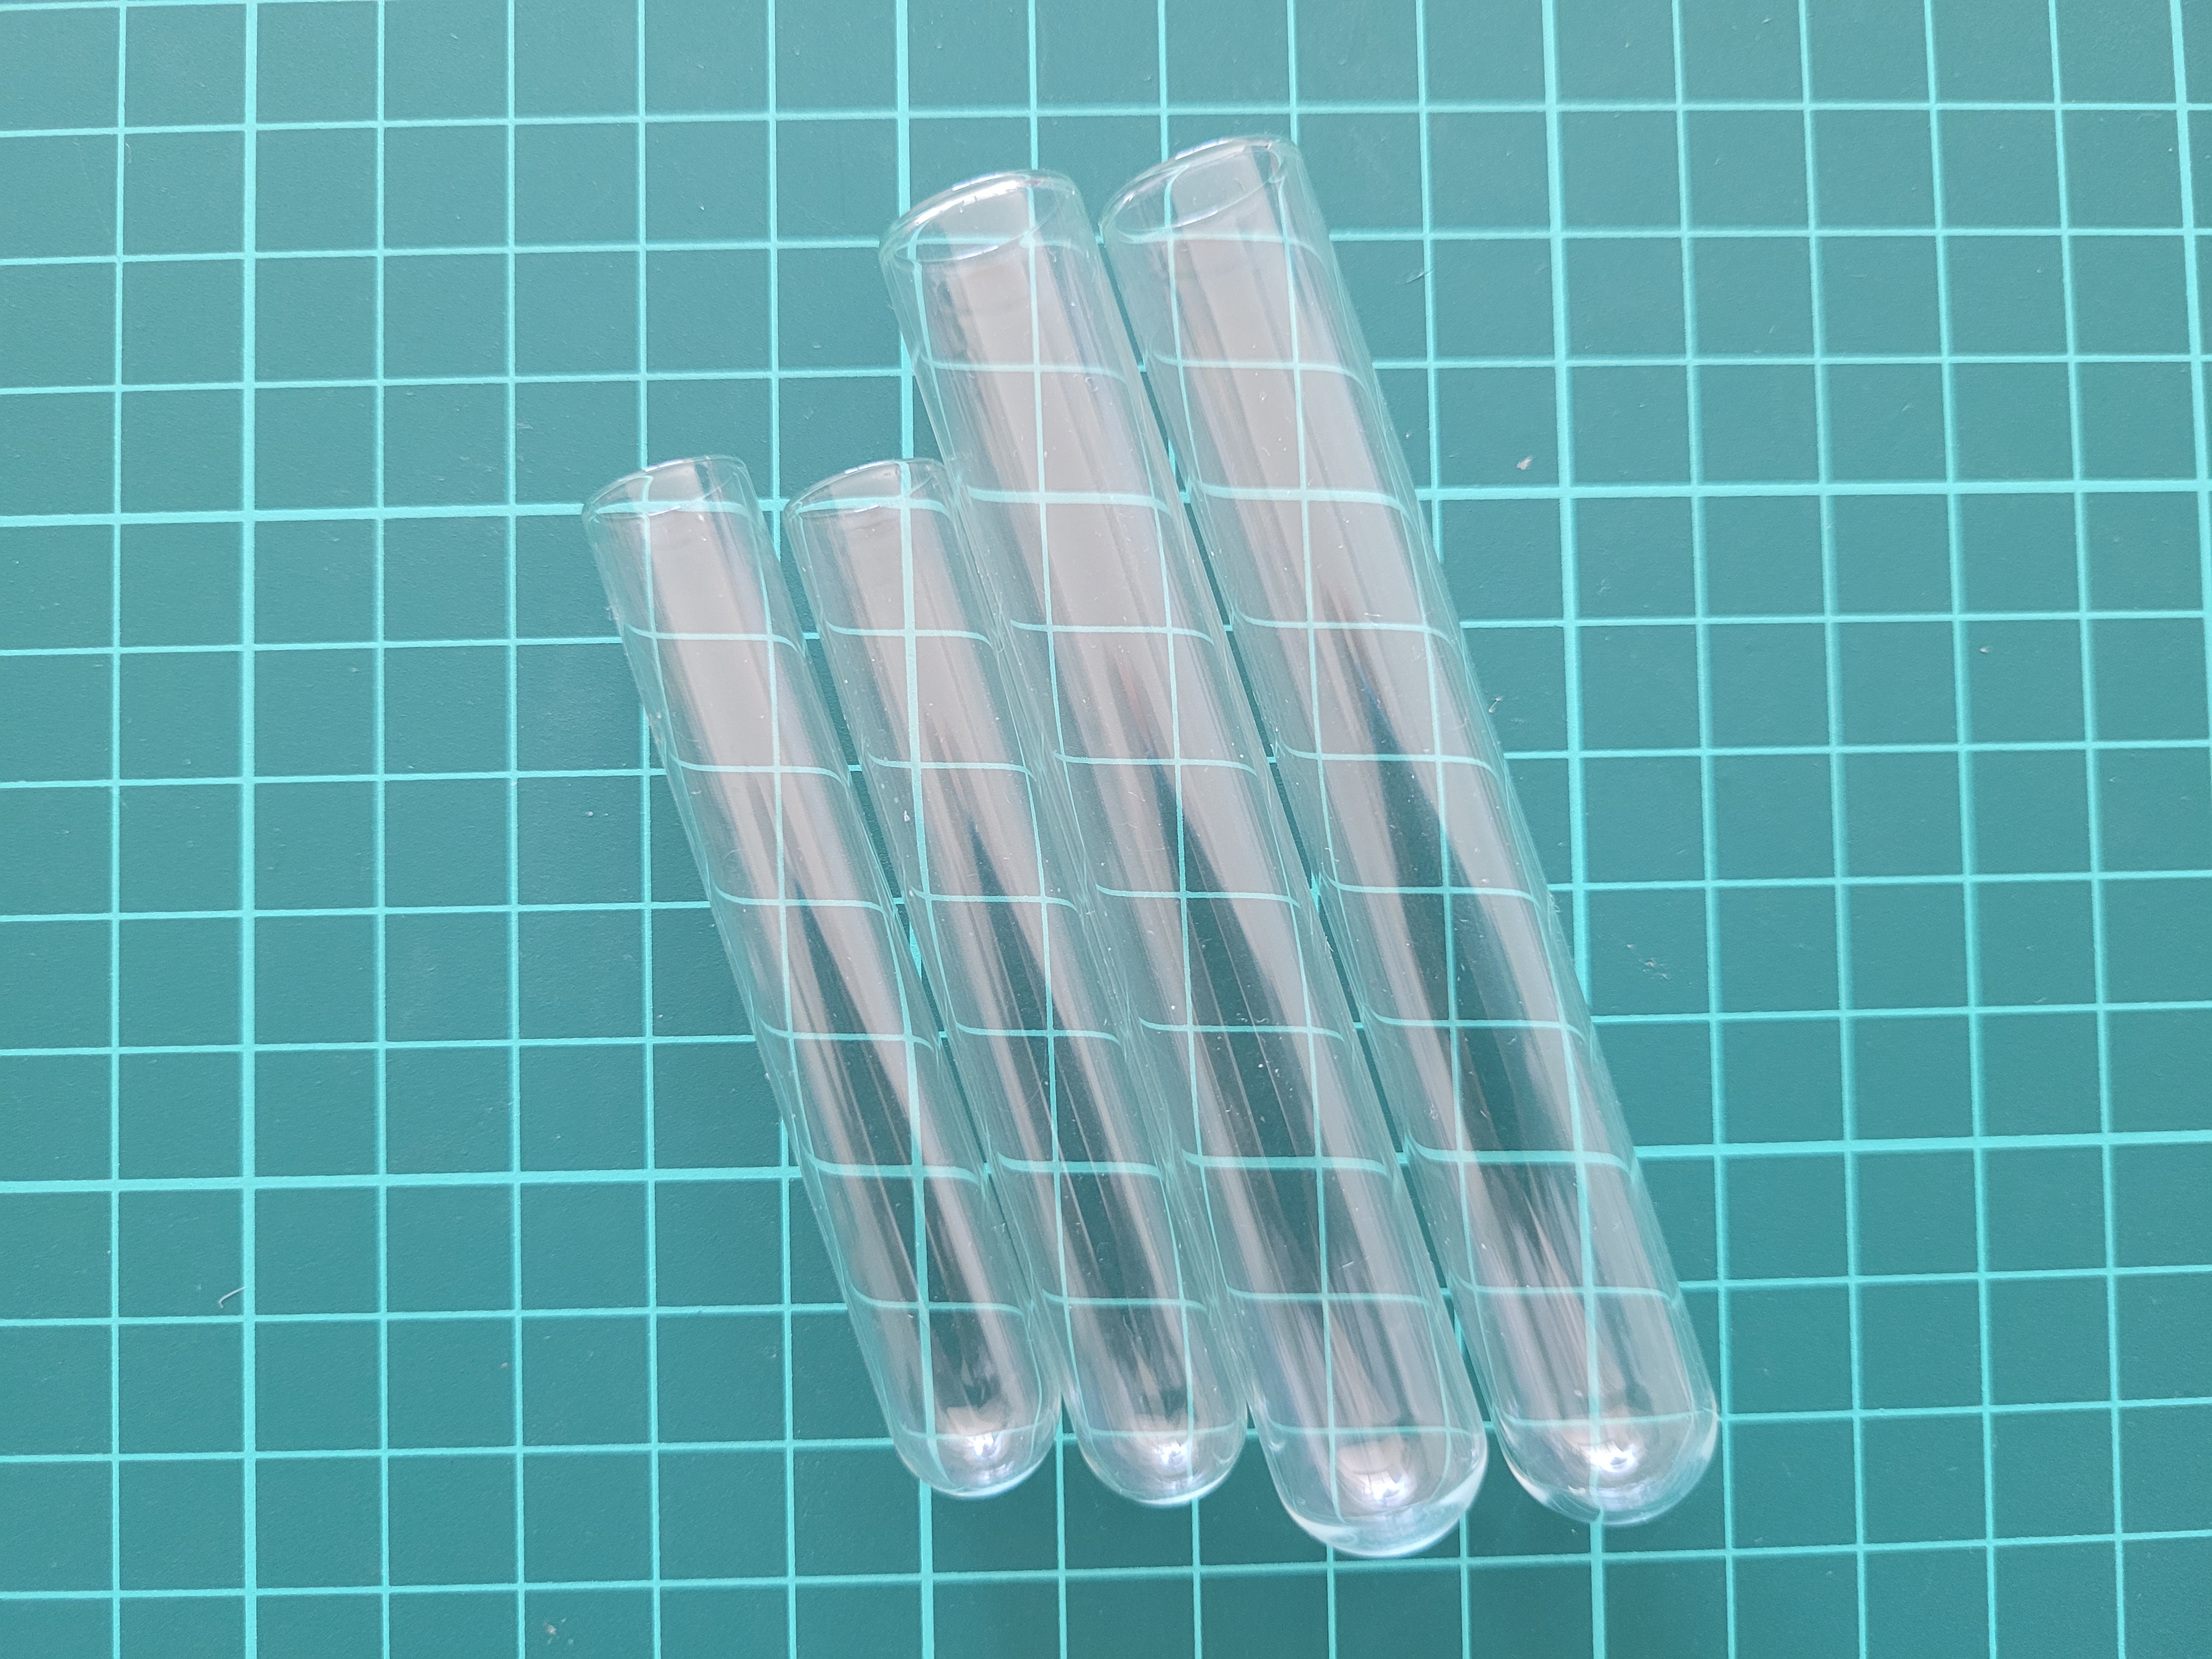
Recently we got some borosilicate test tubes for chemistry projects. The problem with test tubes is that they have a round bottom and they cannot stand up. Instead of buying a stand for the test tubes we decided to design one and to print it in the 3D printer which is more fun. As you can see in the photo we some big and some small test tubes. We decided to make all holes big enough for the big ones to fit inside. I used calipers to measure the diameter of the large tubes We designed it with a height that allows us to easily pick both types of tubes from the top easily We added some rings to the bottom platform so that the tube didn't slip or fall down Before printing the whole thing we printed a small prototype of the holes with 2 different sizes because 3D prints can shrink a little when they cool down. This allowed us to discover that the size of the hole we had chosen wasn't big enough once it printed. So we could change the design before printing the full stand. For design...

Tombstone - Micro:bit robot

Image
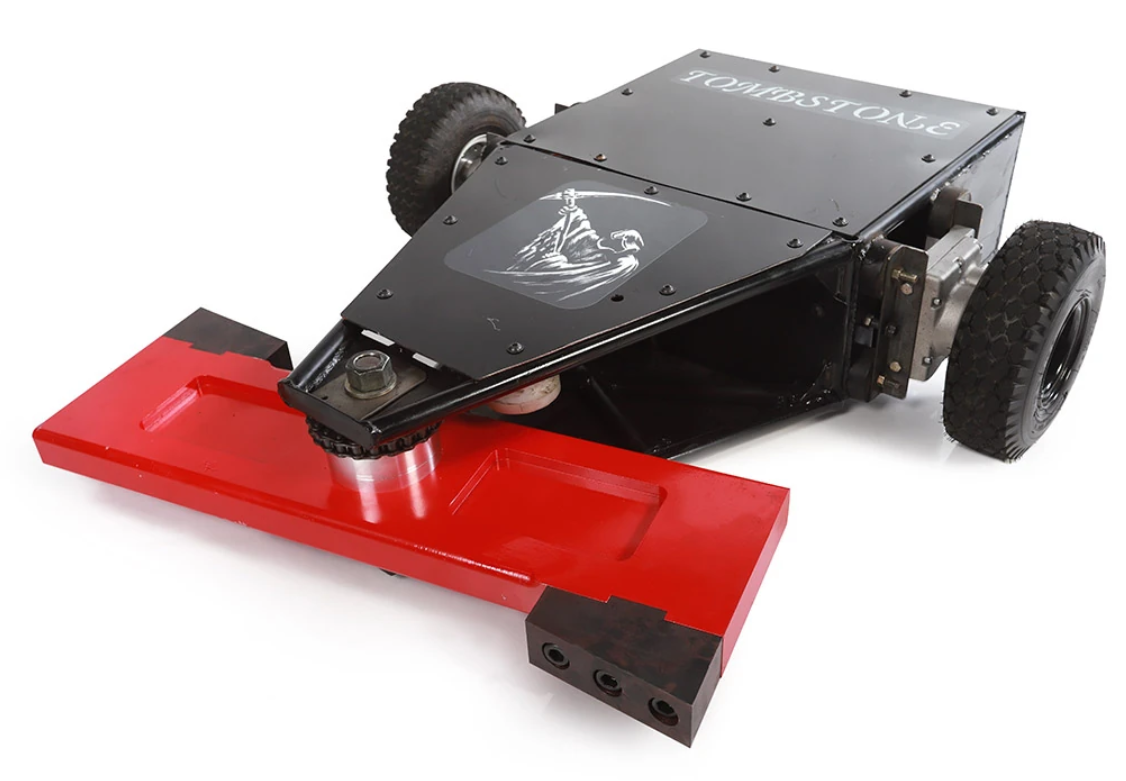
The inspiration for this project was a TV series called Battlebots. We saw 2 seasons on Netflix. It was about robots battling each other in an arena. My favorite robot was called Tombstone. This is the robot we built. It uses some Micro:bit components, some motors and Lego Technic pieces.  It is powered with a USB power bank. The chassis is made out of cardboard and the components are attached with zip ties and blue tag This project requires motors to move the robot and to move the blade at the front. As you can see in the photo we are using 1 Lego motor to move the Lego Technic that controls the blade and 2 non-Lego motors that move the robot. We also added a swivel castor wheel for support Making the robot we discovered that can't connect the motors directly to the pins on the Micro:bit because you can fry the Micro:bit. So you need to use a motor shield. There are many available but we are using this one from Dfrobot. It is called the Dfrobot Micro:bit expansion board. This one ...

Skeleton Leaves

Image
In this blog post we will be showing you how to make your own skeleton leaves. Well you might be wondering what a skeleton leaf is. Well, it's basically the inside structure of the leaf that supports it and also includes tubes that transport nutrients. There are two types of tubes: the xylem and the phloem. The xylem brings water from the roots up the phloem brings glucose down. To make skeleton leaves  you need to gather some leaves from many different types of plants because you don't know which ones are going to work and which ones are not going to work.  For the next step put them in boiling water with baking soda for one hour. This makes the water alkaline and it helps destroy the soft parts of the leaf that we don't need. Then, put them in a little bit of water with a tablespoon of bleach for a few minutes. In our first attempt we put too much bleach for a few hours so some of them became white as you can see in the photo Then, you need to start brushing it. You wil...

Project Vortex

Image
During the previous 4 blog posts we have been teaching you the skills required to do a Vortex. Let me explain you what Vortex is. In August my school had a school Fair. We had the idea of making an arcade game to raise money for the school. We wanted to charge for playing the game. If you won at the game you would get prizes. We built it over 3 weeks. The code was part of it. We used the Micro:bit. The physical build took a big part of effort as well. We called the game "Vortex". The Fair was hard work as we had to be in the stand for 4 hours. More than 100 people came to play but in the end we managed to raise good money for the school. This is a photo of the stand with people playing Vortex The game is about a light that spins around and you have to stop it in a certain position with a button. The light starts spinning slow and then gets faster with every loop. You get more points for stopping it when it goes faster. This is a video of the game in action We are going to sho...